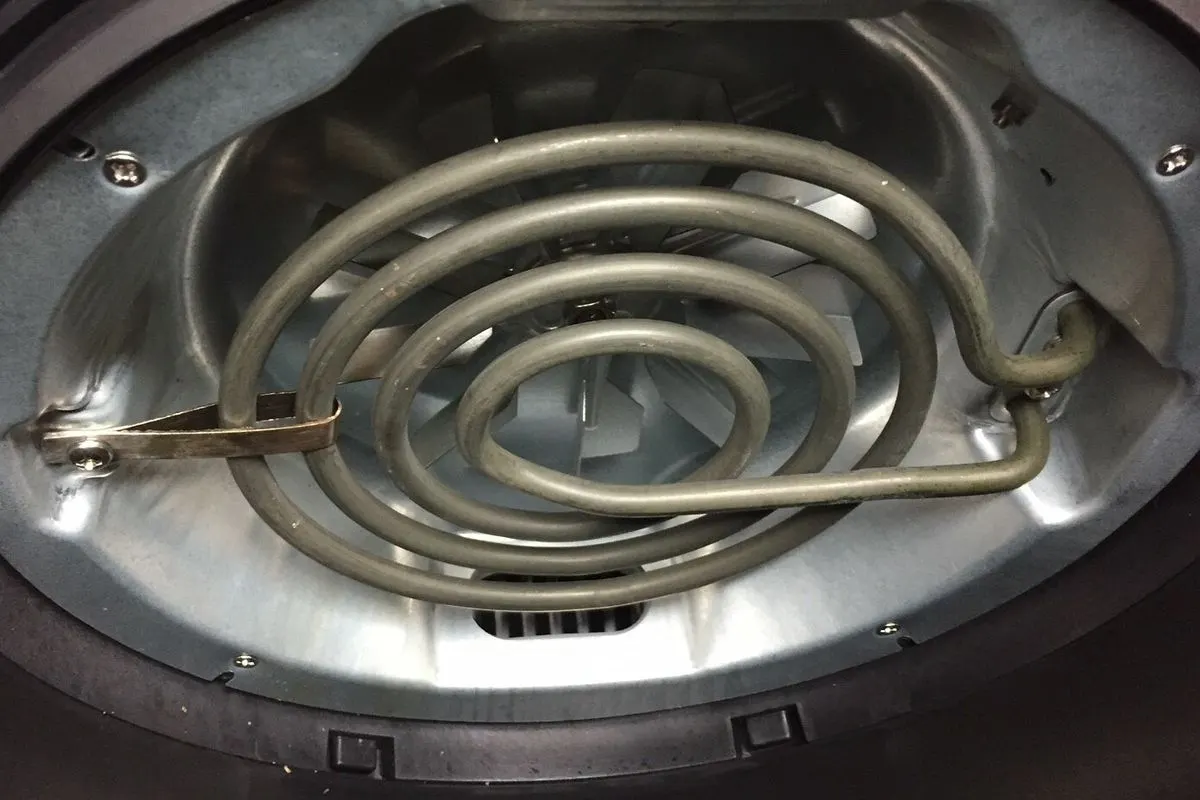
To deep clean an air fryer: unplug it, soak the basket and drawer in hot soapy water for 20–30 minutes, scrub stuck grease with baking soda paste, and wipe the heating element with a damp cloth while the machine is cold. The element is the part almost nobody cleans — and where the smoke comes from.
Pull the basket out and look at the bottom of the drawer, then look up at the element. The whole job takes about 30 minutes, most of it soaking, and costs less than a dollar in baking soda.
Safety first: always unplug the air fryer and let it cool completely before cleaning. Never put the main unit (the part with the plug) in water or the dishwasher.
What you need
- Dish soap and hot water
- Baking soda
- A soft sponge or cloth (no steel wool, no scouring pads)
- A soft-bristle brush (an old toothbrush works)
- Paper towels or a microfiber cloth
- Wooden skewer or toothpick for corners
Step 1: Soak the basket and drawer
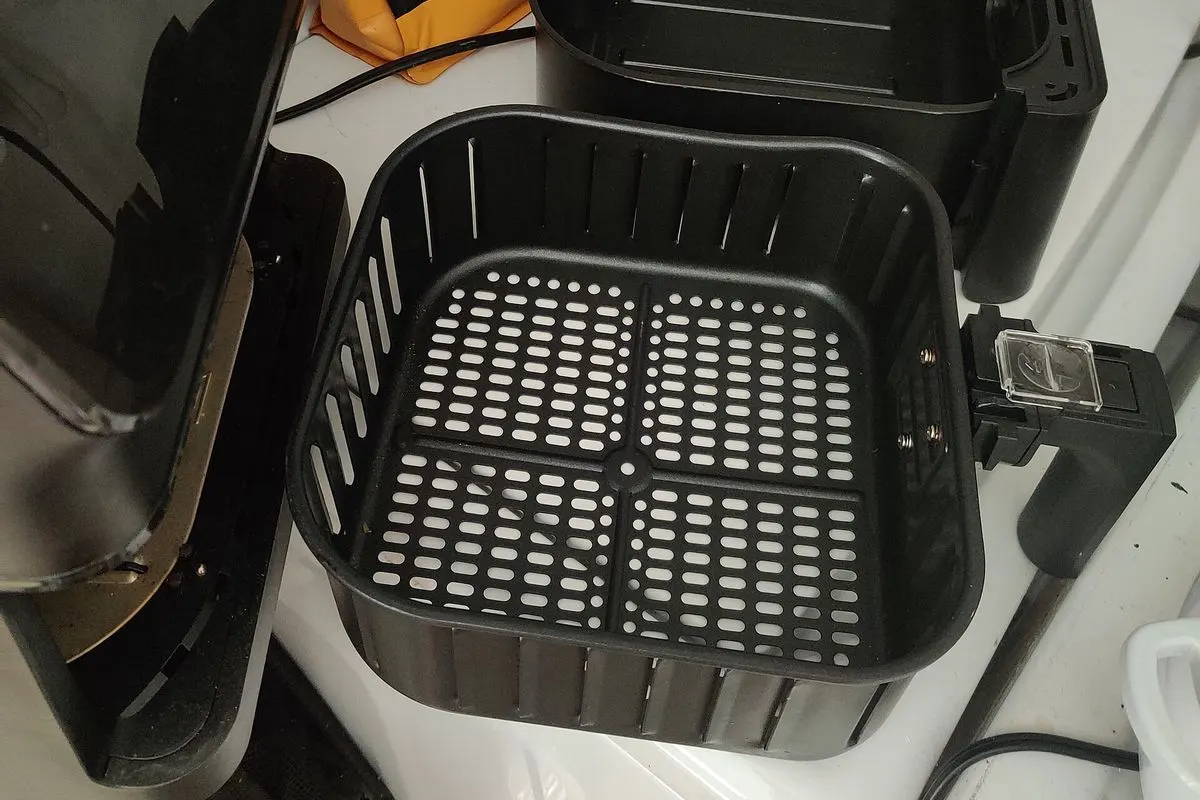
Take out the basket (and the crisper plate, if yours has one) and the drawer. Fill the sink with hot water and a good squeeze of dish soap, and soak for 20–30 minutes. This softens the baked-on grease so you don’t have to scrub hard.
Read next: Peeling Air Fryer Basket: Is It Safe?
Step 2: Baking soda paste for the stubborn spots
Mix 2 tablespoons of baking soda with about 1 tablespoon of water into a thick paste. Spread it on any brown, sticky spots and leave it for 10–15 minutes. Then scrub gently with the soft brush, working into the holes and corners. Rinse well.
Still stuck? Repeat once. Don’t reach for a metal scraper — once the coating scratches, food sticks more and it starts to peel.
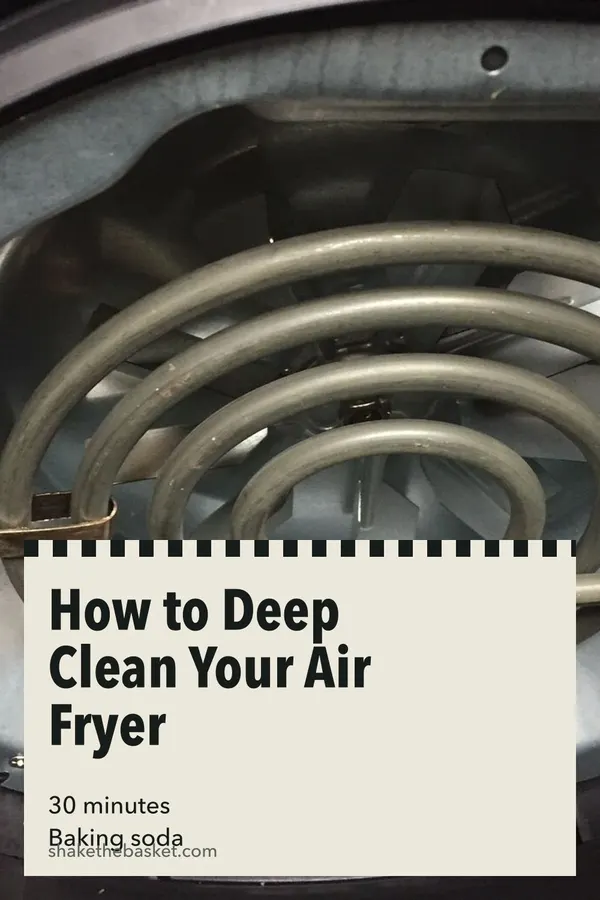
Step 3: Clean the heating element (the part nobody cleans)
This is the big one. With the air fryer unplugged and cold:
- Check your manual first — some brands say exactly how to reach the element.
- Many basket air fryers can be gently turned upside down on a towel so you can see the element.
- Wipe the coil and the area around it with a damp, well-wrung cloth or sponge with a drop of dish soap. For crusty bits, use the soft brush or a little baking soda paste on the cloth.
- Wipe again with a clean damp cloth to remove soap, then dry with paper towels.
Never spray water or cleaner directly into the machine, and never let it drip into the vents.
Step 4: Wipe the inside and outside
Wipe the inside walls of the cavity with a damp soapy cloth, then a clean damp one. Wipe the outside, handle and control panel with a barely damp cloth. Use a toothpick to clean grease out of the seams around the drawer opening.
Step 5: Dry everything completely
Dry the basket and drawer with a towel, then let them air dry fully before putting them back. Trapped water can cause rust spots on some baskets and smells on the next cook. Run the empty air fryer at 300°F (150°C) for 2–3 minutes to finish drying if you’re in a hurry (only with no liners or paper inside).
Why baking soda works and harsher stuff doesn’t
That brown, tacky layer isn’t just dried grease. Oil that’s heated over and over slowly turns into a varnish-like film (the same thing that builds up on a sheet pan), and it bonds to the coating. Two things loosen it without damage:
- Heat and soap. Hot water softens the film and dish soap lifts the fat. That’s why the 20–30 minute soak does most of the work.
- A mild, soft abrasive. Baking soda is gentle: it’s softer than the nonstick coating, so it scours the film without cutting into the surface. It’s also mildly alkaline, which helps break down fat.
What to skip, and why:
| Product | Why not |
|---|---|
| Oven cleaner (lye-based) | Strong enough to strip nonstick coatings and attack aluminum |
| Bleach | Doesn’t cut grease, and it’s unpleasant to heat up later |
| Magic eraser (melamine foam) | It’s a fine abrasive; repeated use dulls and wears the coating |
| Vinegar for grease | Acid doesn’t dissolve fat. It’s fine for hard-water spots on a stainless exterior |
| Mixing vinegar and baking soda | They cancel each other out; the fizz looks busy but cleans less than either alone |
If you use any cleaner beyond soap and baking soda, read the label: the manufacturer’s directions and warnings are the instructions that apply to your machine.
Cleaning schedule by what you cook
| What you cook most | Basket and drawer | Inside cavity | Heating element |
|---|---|---|---|
| Frozen fries, nuggets, vegetables | Every 1–2 uses | Weekly | Every 2–3 months |
| Chicken thighs, wings, salmon | After every use | Every few uses | Monthly |
| Bacon, burgers, sausages | After every use, plus pour off fat mid-cook | After every use | Every 2–3 weeks |
| Cheesy, saucy or glazed food | After every use | After every use | Monthly, or right after a spill |
Someone who makes bacon twice a week is putting a few tablespoons of fat into the drawer every week. That’s what starts smoking on the next cook.
Basket, dual basket or oven-style: what’s different
- Single basket with a crisper plate: the plate usually lifts out (some press-fit; check your manual). Clean under it: grease collects in the drawer below the plate and that’s where most smells start.
- Dual basket: two drawers, two elements. People tend to clean the side they use most. Do both on the same day, and check that the drawers are fully dry before sliding them back in.
- Oven-style air fryers: the racks and drip tray go in the soak, the door glass gets a baking soda paste like an oven door, and the element is usually at the top and sometimes also at the bottom. Rotisserie spits and forks soak with the racks. The crumb tray deserves a weekly empty, because crumbs under the bottom element burn and smoke.
Smells and smoke: find the cause
| Symptom | Usual cause | Fix |
|---|---|---|
| White smoke while cooking fatty food | Fat dripping into a hot drawer | Pour off fat halfway; lower bacon to 350°F (175°C) |
| Burnt smell on every cook | Grease on the heating element | Step 3 above, unplugged and cold |
| Black smoke | Food or a liner touching the element | Turn it off and unplug right away; check what’s up there |
| Plastic smell on a new machine | Manufacturing residue | Wash the basket, then do the empty “burn-off” run your manual describes (often about 10 minutes at 400°F / 200°C) |
| Fishy or garlicky smell days later | Residue on the underside of the crisper plate | Soak the plate separately; dry fully |
| Musty smell | Put away damp | Dry everything completely; leave the drawer open a crack to air out |
If you still get smoke from a clean machine, or the plug or cord gets hot, stop using it and check the CPSC recalls database with your model number.
Dishwasher or hand wash?
Plenty of baskets and crisper plates are labeled dishwasher-safe, and the dishwasher will get them clean. The trade-off is wear: dishwasher detergent is more alkaline and more abrasive than dish soap, and a 60–90 minute hot cycle is harder on a nonstick coating than a 2-minute hand wash. Not every model sells a replacement basket on its own, and when the basket goes, some people end up replacing the whole machine, so hand washing most of the time is the cheaper habit. Use the dishwasher for a reset once in a while, top rack if the manual allows it.
Never put the main unit, the control panel or anything with wires in the dishwasher, whatever the label on the basket says.
Accessories that need cleaning too
- Silicone liners: dishwasher-safe, but grease clings. Scrub with baking soda paste once a month to remove the sticky film.
- Metal racks and skewers: soak with the basket; a toothbrush clears the joints.
- Parchment and paper liners: single use. Reusing a greasy one is a smoke and fire risk.
- Cake pans and dishes: wash like any bakeware; check they aren’t warped, because a pan that rocks can tip and spill onto the drawer.
Quick daily clean (2 minutes)
After each use, once it’s cooled:
- Pour out any grease from the drawer.
- Wash basket and drawer with hot soapy water and a soft sponge.
- Wipe the inside of the cavity with a damp paper towel.
Doing this every time makes the monthly deep clean much easier.
What NOT to do
| Don’t | Why |
|---|---|
| Steel wool or scouring pads | Scratches the nonstick coating |
| Oven cleaner or harsh degreasers | Can damage the coating and the machine |
| Submerge the main unit | It’s electrical |
| Metal utensils to scrape | Scratches, then peeling |
| Reassemble while wet | Rust spots and smells |
Make cleanup easier next time
- Use a perforated liner or a silicone liner for sticky, saucy or cheesy foods — with food on top so it can’t fly up. Which liner is best?
- Cook bacon at 350°F (175°C), not max heat, to reduce splatter and smoke.
- Pour off fat during long cooks like chicken wings or turkey breast.
More air fryer basics: 12 Things You Should Never Put in Your Air Fryer
FAQ
How often should I deep clean my air fryer?
Wash the basket and drawer after every use (or every couple of uses for dry foods), and do a full deep clean including the heating element about once a month — more often if you cook bacon, wings or other fatty foods a lot.
Can I put my air fryer basket in the dishwasher?
Many baskets are dishwasher-safe — check your manual. Even when they are, hand washing with a soft sponge makes the nonstick coating last longer.
Can I use oven cleaner on my air fryer?
No. Oven cleaners are harsh and can damage nonstick coatings and the inside of the machine. Baking soda paste and dish soap are enough.
Why does my air fryer smell even after cleaning?
Usually grease on the heating element or the underside of the basket. Clean the element (unplugged and cool) and dry everything completely before the next use.
Sources
We check temperatures and safety advice against these official sources. Spotted something wrong? Email [email protected].